Marble 2 beta
How To Use Atlas
Atlas builds a scene through images: pose your starting views, generate new viewpoints, then edit what is in them. Each view carries camera and depth information that you can reuse as the project grows.
1. Pose your images
Start with images2PosedRGBD. There are two ways to build your initial scene:
- Reconstruct an existing place. Submit images with overlapping camera views together so the service can estimate their relative positions. Use sharp images of a mostly static scene, with similar exposure and lighting.
- Connect images creatively. Pose individual images in separate requests, then place the returned views at positions and orientations you choose in one shared scene. Atlas can invent the space connecting them when you generate new views.
Overlapping camera views. Camera views may overlap only if they were reconstructed together from the same real location or if Atlas is generating the view. Independently posed creative images must have non-overlapping camera views. Place them plausibly in the scene so their geometry fits together and Atlas can connect them.
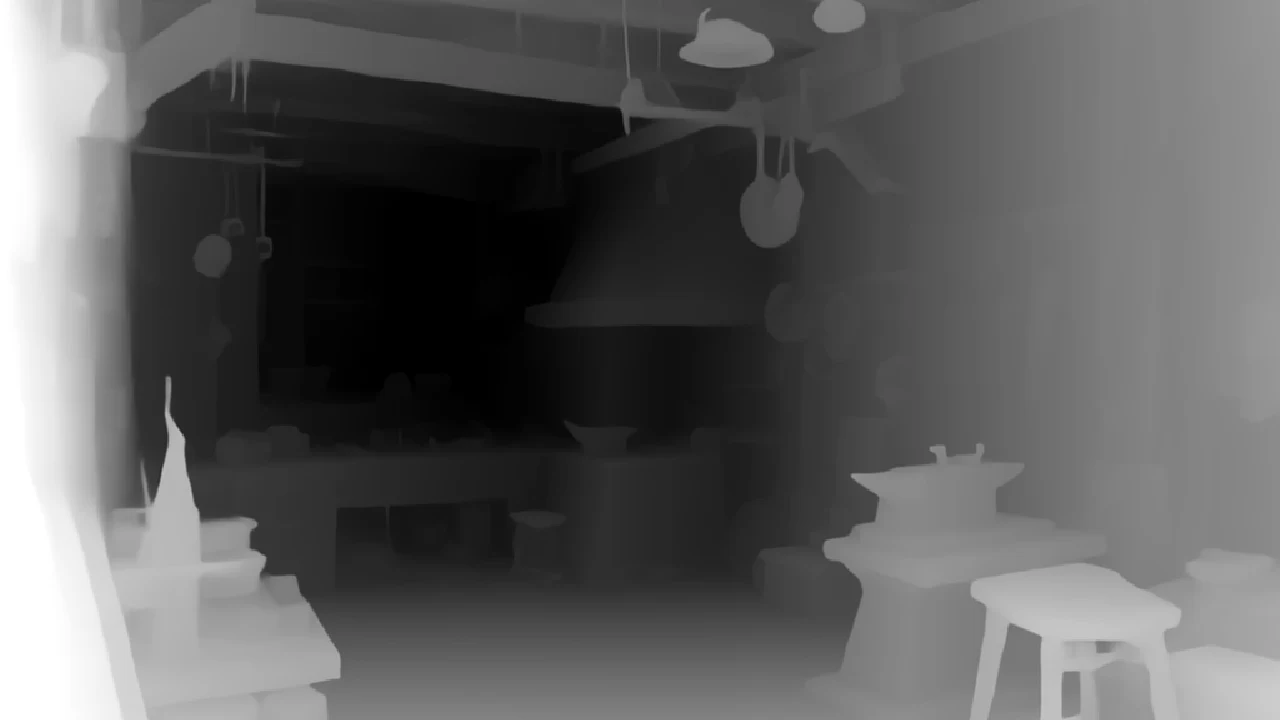
Posing returns each image with a camera and a depth map. The camera describes where the image was taken, which direction it faces, and its field of view. Depth estimates how far the visible surfaces lie from the camera. Together, these form a posed RGBD view: color, camera, and depth that describe the same part of the scene.
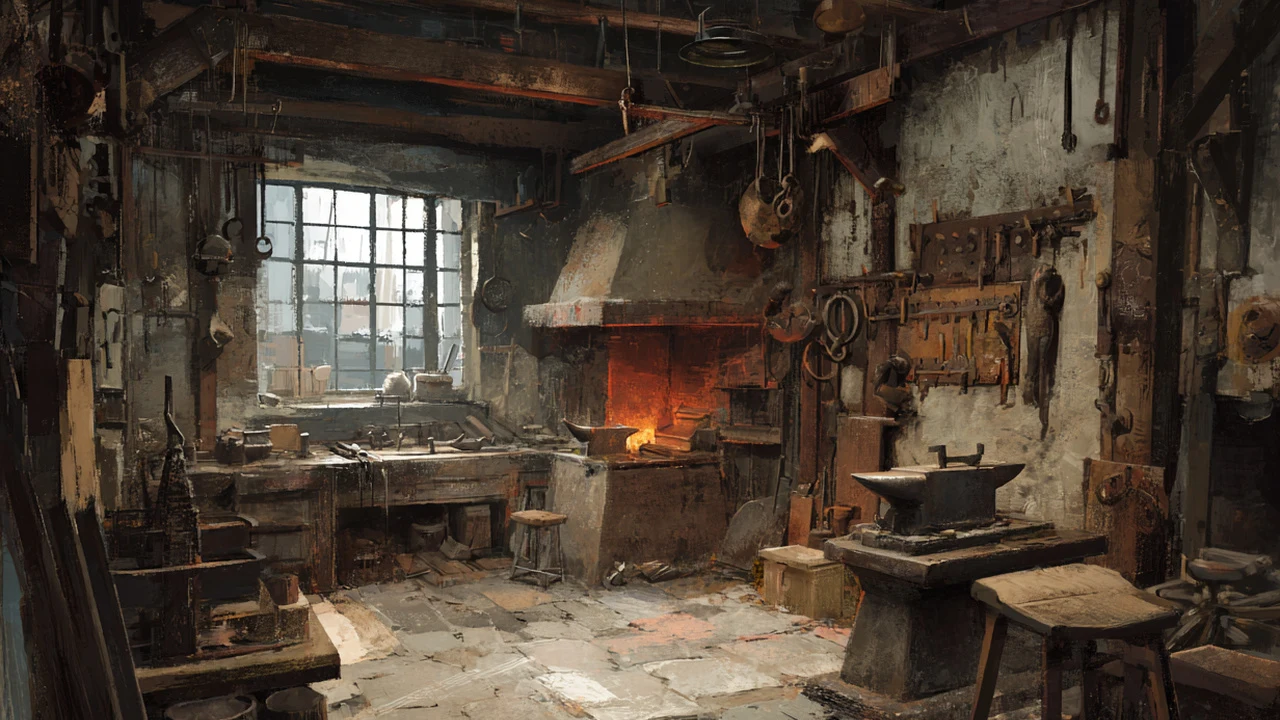
Our example starts with one image of a blacksmith's workshop. Posing reframes it to the standard 1280 × 720 grid and estimates its geometry.
2. Generate new views
Choose where to look next. Send your posed images as contextFrames to
atlasGenerate, along with new targetCameras.
The context tells Atlas what is already in the scene; the target cameras tell
it where to render. Your application or agent chooses those cameras and
keeps track of the scene.
Atlas returns an RGB image and camera for every target. Set returnDepth: true
to receive depth as well, so the new views can become context for another
request.
Starting from the workshop's original posed camera, we turn 20° to the right and apply a −0.25 X translation.
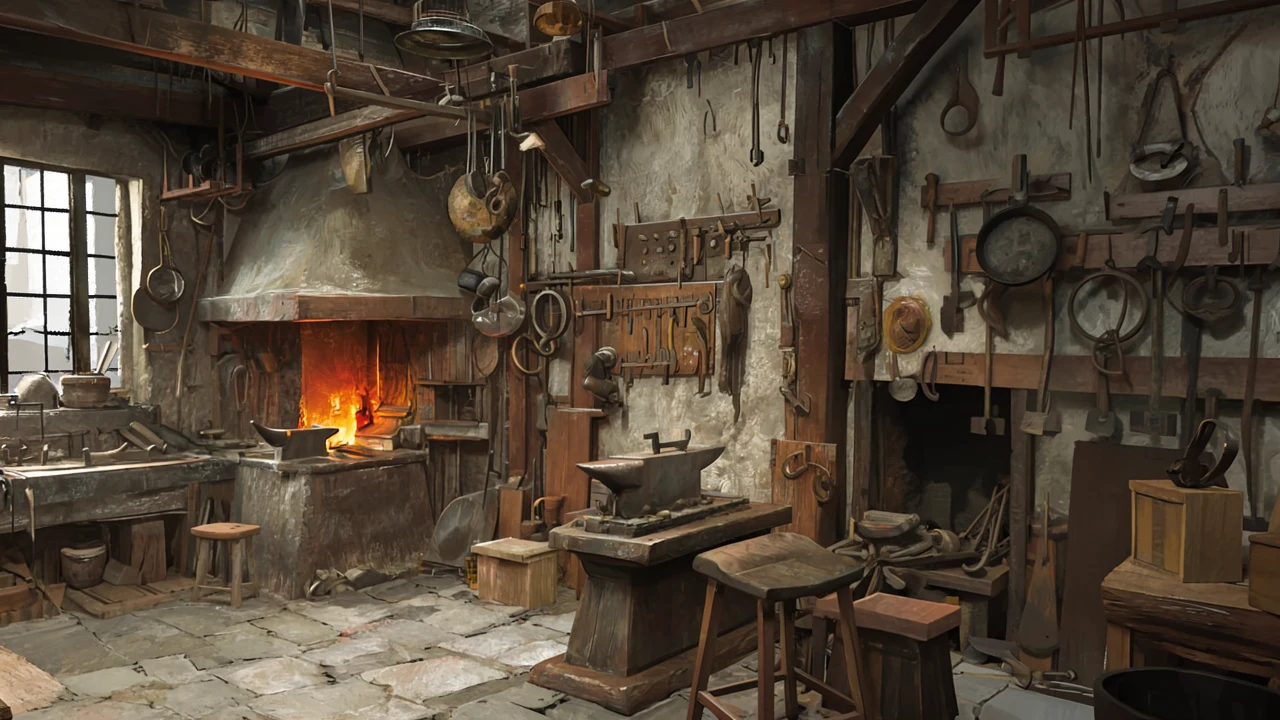
Inspect the result, add useful returned RGBD views to your context, and choose the next cameras. Repeat to explore further. Atlas invents areas outside the original images.
Important: reuse the scene prompt for faster generation. For subsequent views of the same scene, pass the previous response's
promptUsedaspromptand setenhancePrompt: false. This skips recaptioning the context images and reduces generation latency.
3. Edit objects
Use atlasMasked to remove, replace, or add objects across posed views. Send each RGB image with its camera and a separate grayscale mask: black marks the area to edit; white preserves the image. Cover the whole object in every affected view, and pair each image with a target camera at the same viewpoint.
With prompt enhancement enabled, describe the edit explicitly, such as "replace the wooden stool beside the anvil with a metal toolbox." The prompt enhancer uses the RGB images and your edit instruction. Inspect the completed views before using them as scene context again.
Keep cameras and depth aligned
The image, camera, and depth for a view are one unit. Keep the returned bundle together, including any confidence map.
- Pixel grid: use the images returned by posing, which may have been resized or cropped. Atlas generation targets use 1280 × 720. If you change a view's pixels, update its camera intrinsics and aligned maps to match.
- Coordinates: all camera poses are camera-to-world and must share one world frame and distance unit. Quaternions use XYZW order. RUB cameras look along local -Z; RDF cameras look along local +Z. Convert the camera pose when changing coordinate conventions.
- Depth and scale: calibrate the scene scale for measurements in meters. Linear EXR values use the scene's distance units; encoded depth PNGs need decoding. Scale the depth and camera positions together when resizing an entire scene.
Cameras and posed images covers camera math, resizing, coordinate conversion, and EXR row order. Use it before projecting image points into 3D or planning a camera path from depth.
Choose context and prompts
Use context views that show the part of the scene you want to preserve. For creative connections, place independently posed images plausibly with non-overlapping camera views. Inspect generated views before adding them back, since geometry or appearance errors can carry into later requests.
Describe the environment, materials, lighting, and spatial relationships.
Prompt enhancement is on by default; reuse promptUsed for continued
exploration as described above. For a masked edit with enhancement disabled,
describe the finished scene.
Start with the service's model and sampling defaults. See Best
practices for more input guidance.
Other models
| Task | When to use it |
|---|---|
| atlasTextToImage | Create a starting image from an environment description. It can also return an estimated camera and depth. |
| atlasChisel | Generate views from a prompt and optional depth layouts. Use it to give a planned scene its appearance; pair each depth layout with its target camera. |
| splats2Mesh | Convert an existing Gaussian splat scene into a GLB mesh, with optional texture or vertex colors. |
For runnable requests, use the CLI guide, TypeScript quickstart, or API quickstart. Task availability depends on your account; the API reference contains the available endpoints, fields, and limits.